Hey!
In this post we are going to:
- create a docker image for the Rails chat application that we created in the previous post
- configure the Docker environment and run the application by:
- creating a container for the PostgreSQL database
- creating a container for the Redis server
- creating a container with the required configuration from the image we built
Prerequisites
Install docker
The first thing you need in order to follow this tutorial is to install Docker on your machine.
We are going to use the Docker Community Edition. Follow the installation instructions matching your system.
I’m on Ubuntu 18.04 LTS so following the instructions, I had to:
- Uninstall previous versions with:
sudo apt-get remove docker docker-engine docker.io containerd runc
- I chose to install the application using the repository.
sudo apt-get update

sudo apt-get install \
     apt-transport-https \
     ca-certificates \
     curl \
     gnupg-agent \
     software-properties-common

curl -fsSL https://download.docker.com/linux/ubuntu/gpg | sudo apt-key add -
and I verified that I had the key with the proper fingerprint after executing:
sudo apt-key fingerprint 0EBFCD88
- I set up the repository with:
sudo add-apt-repository \
   "deb [arch=amd64] https://download.docker.com/linux/ubuntu \
   $(lsb_release -cs) \
   stable"
The installation took place with these commands:
sudo apt-get update

sudo apt-get install docker-ce docker-ce-cli containerd.io
- I checked that the installation was successful with:
$ sudo docker run hello-world

Unable to find image 'hello-world:latest' locally
latest: Pulling from library/hello-world
1b930d010525: Pull complete
Digest: sha256:...
Status: Downloaded newer image for hello-world:latest

Hello from Docker!
This message shows that your installation appears to be working correctly.

To generate this message, Docker took the following steps:
 1. The Docker client contacted the Docker daemon.
 2. The Docker daemon pulled the "hello-world" image from the Docker Hub.
    (amd64)
 3. The Docker daemon created a new container from that image which runs the
    executable that produces the output you are currently reading.
 4. The Docker daemon streamed that output to the Docker client, which sent it
    to your terminal.

To try something more ambitious, you can run an Ubuntu container with:
 $ docker run -it ubuntu bash

Share images, automate workflows, and more with a free Docker ID:
 https://hub.docker.com/

For more examples and ideas, visit:
 https://docs.docker.com/get-started/
Important note
Upon installation, a new user group was created with the name docker. If you want to allow users to do docker stuff without using sudo, you have to do some extra configuration (read more here) but keep in mind that:
The docker group grants privileges equivalent to the root user. For details on how this impacts security in your system, see Docker Daemon Attack Surface. – Post-installation steps for Linux - Official Docker installation instructions
We are going to use sudo in this tutorial.
Clone the rails chat tutorial from GitHub
Navigate to your development directory on your machine and clone the sample Rails chat application with:
git clone https://github.com/iridakos/rails-chat-tutorial
Done.
Configure the application to use PostgreSQL for the production environment
The application is configured to use the predefined sqlite database adapter. For the purpose of this tutorial we will change the adapter to postgresql and at the second part of the post we will create a container running the PostgreSQL database.
Open the file config/database.yml file and change the production configuration as described below:
production:
  <<: *default
  adapter: postgresql
  host: <%= ENV.fetch('DATABASE_HOST') %>
  port: <%= ENV.fetch('DATABASE_PORT') %>
  username: <%= ENV.fetch('DATABASE_USERNAME') %>
  password: <%= ENV.fetch('DATABASE_PASSWORD') %>
Open the application’s Gemfile and add the following lines:
group :production do
  gem 'pg'
end
to install the adapter. The pg gem requires to have the package libpq-dev installed on the machine. We will satisfy this requirement when building the image.
Building the docker image
We are going to build the image gradually in order to understand what’s going on with every command we use.
Create the Dockerfile
Whenever we want to create a new image in docker we use a file named Dockerfile. It is a text file with instructions to be followed sequentially to assemble an image.
Navigate to the Rails chat tutorial (from now I will call this application directory) directory and create the file.
touch Dockerfile
and before continuing let’s try to build the image with just that empty file:
sudo docker build . -t rails-chat-tutorial
Of course we get an error, but take a look at the first line of the log:
Sending build context to Docker daemon  46.39MB
Error response from daemon: the Dockerfile (Dockerfile) cannot be empty
When building an image, Docker creates a build context which is actually the files that will be available when the Dockerfile’s commands get executed.
The . (dot) part of the build command that we used tells Docker to try to build the image using the current directory for its build context.
Since we didn’t explicitly specified in the command which Dockerfile to use, Docker will use the one that is located in the root of the context.
Define the parent image
A parent image is the image that your image is based on. It refers to the contents of the FROM directive in the Dockerfile. Each subsequent declaration in the Dockerfile modifies this parent image. Most Dockerfiles start from a parent image, rather than a base image. However, the terms are sometimes used interchangeably. – Create a base image - Official Docker Documentation
Building the image from scratch is out of the context of this tutorial but if you want to familiarize your self with this aspect, read more here.
Docker provides official Ruby images and we are going to use the version that the Rails chat tutorial uses which is 2.6.2 as our parent image.
Open Dockerfile and add the following line:
FROM ruby:2.6.2-stretch
and run the build command again:
$ sudo docker build . -t rails-chat-tutorial
Sending build context to Docker daemon  46.39MB
Step 1/1 : FROM ruby:2.6.2-stretch
2.6.2-stretch: Pulling from library/ruby
e79bb959ec00: Pull complete
d4b7902036fe: Pull complete
1b2a72d4e030: Pull complete
d54db43011fd: Pull complete
69d473365bb3: Pull complete
84ed2a0dc034: Pull complete
75df5efa5606: Pull complete
f0d10aea813b: Pull complete
Digest: sha256:d5af6b19da8381014f59e79245ae242dd5ea8dfe1a8a6c0e2bc481366f1e92b9
Status: Downloaded newer image for ruby:2.6.2-stretch
 ---> 8d6721e9290e
Successfully built 8d6721e9290e
Successfully tagged rails-chat-tutorial:latest
Execute the following command to see which images Docker has.
$ sudo docker image list
REPOSITORY            TAG                 IMAGE ID            CREATED             SIZE
rails-chat-tutorial   latest              8d6721e9290e        10 days ago         870MB
ruby                  2.6.2-stretch       8d6721e9290e        10 days ago         870MB
hello-world           latest              fce289e99eb9        3 months ago        1.84kB
The hello-world is the Docker’s image that we used after installing Docker.
The other image, the ruby one is the parent image of our image. Since the Dockerfile didn’t have any custom instructions other that just defining a parent image, the resulting image rails-chat-tutorial is actually the same as the parent image and has the same IMAGE ID, CREATED and SIZE properties. Time to change this.
Copying the application code
The purpose of the image that we are building is to serve the Rails chat tutorial application. Eventually, to do so it’s pretty obvious that the image must contain the code of the application.
We will use the COPY command to copy the code inside the image.
Open the Dockerfile and append the following line:
COPY . /application
This command will copy all files from inside the build context to the image.
- the first argument is the location of the build context to be copied
- the second argument is the target location inside the image
Build the image again and execute the following command to confirm that we are good.
docker run -i -t rails-chat-tutorial
If you take a look at the ruby’s docker image, you will see that the last line is:
CMD [ "irb" ]
Since we don’t define something different in our image, the same command is being executed and that’s why the execution of the previous command brought us to Ruby’s irb console.
Let’s see what the /application directory of the container has.
Dir['/application/*']
=> ["/application/config.ru", "/application/Rakefile", "/application/lib", "/application/storage", "/application/test", "/application/Gemfile", "/application/app", "/application/Gemfile.lock", "/application/LICENSE", "/application/log", "/application/public", "/application/tmp", "/application/vendor", "/application/bin", "/application/README.md", "/application/config", "/application/package.json", "/application/Dockerfile", "/application/db"]
Cool, the application directory has been copied. Moving on.
Install application dependencies
Before starting the server (puma in our case), we have to install the dependencies of the application. To do so, add the following line to the Dockerfile.
RUN bundle install --deployment --without development test
and rebuild the image.
build . -t rails-chat-tutorial
Sending build context to Docker daemon  46.39MB
Step 1/3 : FROM ruby:2.6.2-stretch
 ---> 8d6721e9290e
Step 2/3 : COPY . /application
 ---> f9b9d813d6a0
Step 3/3 : RUN bundle install --deployment --without development test
 ---> Running in a6c8c25da3f5
Could not locate Gemfile
The command '/bin/sh -c bundle install --deployment --without development test' returned a non-zero code: 10
We have an error because for the bundle command to succeed we must first change to the application’s root directory that does contain the Gemfile file.
Change the contents of the Dockerfile to the following:
FROM ruby:2.6.2-stretch

# Copy application code
COPY . /application
# Change to the application's directory
WORKDIR /application

# Install gems
RUN bundle install --deployment --without development test
and rebuild. Now the gems are being installed and we are ready to start the server.
$ docker build . -t rails-chat-tutorial
Sending build context to Docker daemon  46.39MB
Step 1/4 : FROM ruby:2.6.2-stretch
 ---> 8d6721e9290e
Step 2/4 : COPY . /application
 ---> b1aae569faf4
Step 3/4 : WORKDIR /application
 ---> Running in ab90edf73be5
Removing intermediate container ab90edf73be5
 ---> 6bbdaa9942e3
Step 4/4 : RUN bundle install --deployment --without development test
 ---> Running in 22724a3684fe
The dependency tzinfo-data (>= 0) will be unused by any of the platforms Bundler is installing for. Bundler is installing for ruby but the dependency is only for x86-mingw32, x86-mswin32, x64-mingw32, java. To add those platforms to the bundle, run bundle lock --add-platform x86-mingw32 x86-mswin32 x64-mingw32 java.
Fetching gem metadata from https://rubygems.org/............
Fetching rake 12.3.2
Installing rake 12.3.2
Fetching concurrent-ruby 1.1.5
...
...
...
Fetching sqlite3 1.4.0
Installing sqlite3 1.4.0 with native extensions
Fetching uglifier 4.1.20
Installing uglifier 4.1.20
Bundle complete! 21 Gemfile dependencies, 69 gems now installed.
Gems in the groups development and test were not installed.
Bundled gems are installed into ./vendor/bundle
...
...
...

Removing intermediate container 22724a3684fe
 ---> d0d3163a8cca
Successfully built d0d3163a8cca
Successfully tagged rails-chat-tutorial:latest
Asset compilation
In the production environment, assets have to be pre-compiled.
We will add this task in our ENTRYPOINT script (see below) because during asset compilation Rails initializes the application and if we executed the task upon building the image, the initialization would fail since some components (like database connection, configuration of services based on environment variables like cable.yml) are not available.
We must install a Javascript environment in the container though or else when the time comes and the task is executed, will get the following error:
ExecJS::RuntimeUnavailable: Could not find a JavaScript runtime. See https://github.com/rails/execjs for a list of available runtimes.
We will install nodejs, add the following line:
RUN curl -sL https://deb.nodesource.com/setup_10.x | bash - \
    apt install -y nodejs
Rebuild and you should be fine.
Start the server
We want to start the application in the production environment. Rails can resolve this via the environment variable RAILS_ENV.
To set it in the image, add in Dockerfile:
ENV RAILS_ENV production
The last instruction in the Dockerfile will be our ENTRYPOINT.
Add the following line:
ENTRYPOINT ./entrypoint.sh
What’s left to do is to configure the entrypoint.sh script to do the following:
- compile the assets
- start the server
Create a file named entrypoint.sh in the root application directory and add:
# Compile the assets
bundle exec rake assets:precompile

# Start the server
bundle exec rails server
This file has to be executable, so in your terminal:
chmod +x ./entrypoint.sh
That’s all.
Since there are no more modifications to be done in our Dockerfile, make sure its contents are the following:
FROM ruby:2.6.2-stretch

# Copy application code
COPY . /application
# Change to the application's directory
WORKDIR /application

# Install gems
RUN bundle install --deployment --without development test

# Set Rails environment to production
ENV RAILS_ENV production

RUN curl -sL https://deb.nodesource.com/setup_10.x | bash - \
    && apt install -y nodejs

# Start the application server
ENTRYPOINT ./entrypoint.sh
Compacting the Dockerfile
We will optimize the Dockerfile since each RUN command creates a new image (read more here).
We will merge the RUN commands in one and move the ENV command just before it. The resulting Dockerfile is:
FROM ruby:2.6.2-stretch

# Copy application code
COPY . /application
# Change to the application's directory
WORKDIR /application

# Set Rails environment to production
ENV RAILS_ENV production

# Install gems, nodejs and precompile the assets
RUN bundle install --deployment --without development test \
    && curl -sL https://deb.nodesource.com/setup_10.x | bash - \
    && apt install -y nodejs

# Start the application server
ENTRYPOINT ['./entrypoint.sh']
Running the application in the Docker environment
Creating the PostgreSQL container
We are going to create a container for the PostgreSQL database.
We need to specify two environment variables to configure a user for our application: POSTGRES_USER and POSTGRES_PASSWORD. The values of these environment variables will be used later on when creating the application’s container.
sudo docker run --name rails-chat-tutorial-pg
            -e POSTGRES_USER=postgres
            -e POSTGRES_PASSWORD=postgres
            -p 5432:5432
            -d postgres
Since the image doesn’t exist locally, Docker will fetch it from the Official Docker images and then it will create a container, binding the PostgreSQL default port 5432 to the same port of the host.
Notes: I suggest you read this documentation if you want to familiarize yourself with the options you have for customizing the container (volumes/database configuration etc).
Creating the Redis container
To create the redis container, all we have to do is run the following command:
sudo docker run --name rails-chat-tutorial-redis \
            -p 6379:6379 \
            -d redis
Again, since the image doesn’t exist locally, Docker will fetch it from the Official Docker images and then it will create a container, binding its 6376 to the same port of the host.
Creating the application’s container
At this point, your docker running containers should look like this:
$ sudo docker ps

CONTAINER ID        IMAGE               COMMAND                  CREATED             STATUS              PORTS                    NAMES
<a container id>    redis               "docker-entrypoint.s…"   2 minutes ago       Up 2 minutes        0.0.0.0:6379->6379/tcp   rails-chat-tutorial-redis
<a container id>    postgres            "docker-entrypoint.s…"   2 minutes ago       Up 2 minutes        0.0.0.0:5432->5432/tcp   rails-chat-tutorial-pg
The Rails chat tutorial in production mode needs the following environmental variables:
- database.yml
- DATABASE_HOST: 172.17.0.1
- DATABASE_PORT: 5432
- DATABASE_USERNAME: postgres
- DATABASE_PASSWORD: postgres
- cable.yml
- REDIS_URL: redis://172.17.0.1:6379/1
To create the container for the image that we created in this post passing the required environment variables, use:
sudo docker run --name rails-chat-tutorial-web \
            -e DATABASE_HOST=172.17.0.1 \
            -e DATABASE_PORT=5432 \
            -e DATABASE_USERNAME=postgres \
            -e DATABASE_PASSWORD=postgres \
            -e REDIS_URL=redis://172.17.0.1:6379/1 \
            -p 3000:3000 \
            rails-chat-tutorial
Note: we bound the container’s 3000 port on the same port of the host.
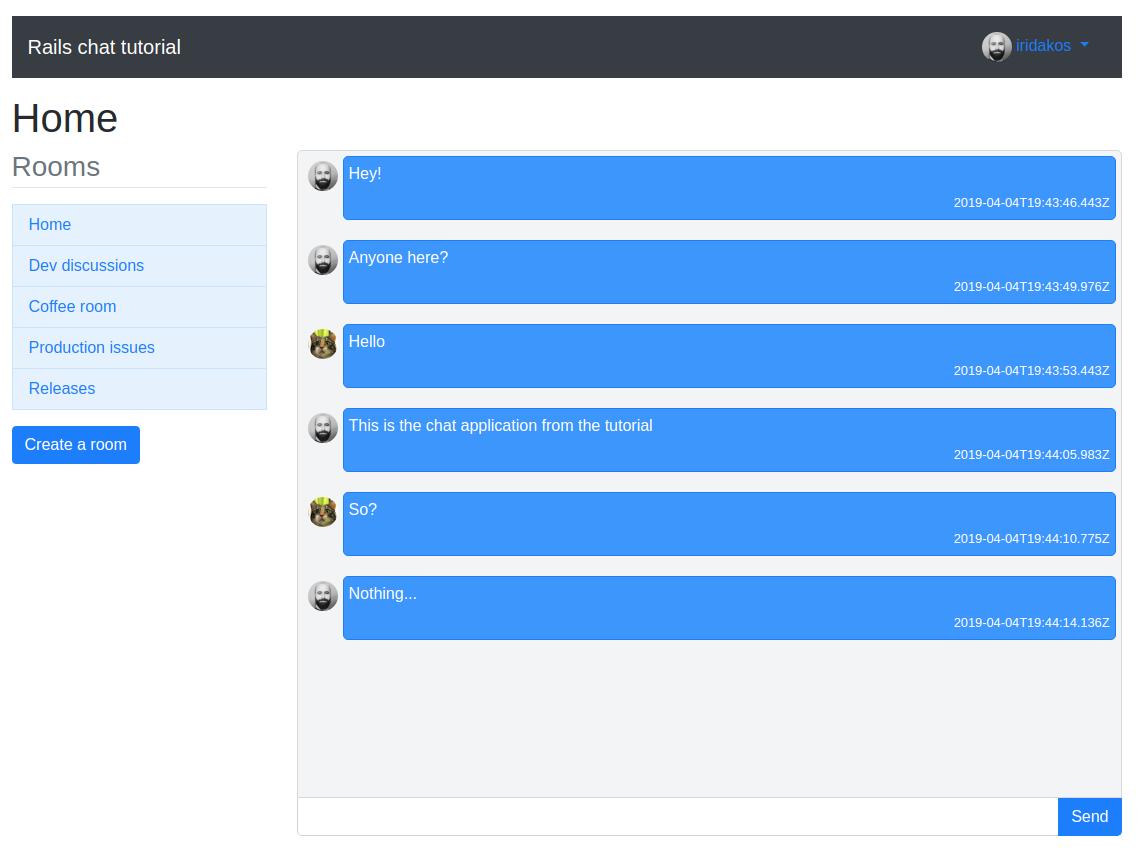
Navigate to http://localhost:3000 and see what happens.
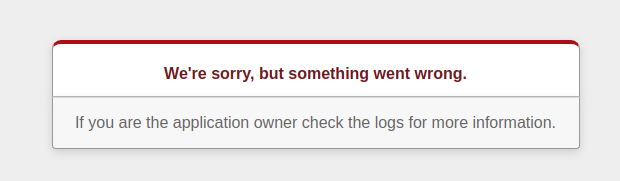
We don’t get very helpful information on the error since the application is running in production mode (at least this worked :P). Let’s connect to the container and check the logs:
$ sudo docker exec -it rails-chat-tutorial-web bash
Now you are connected to the container. Check the /application/production.log file. Somewhere among all these lines you will see the following:
ActiveRecord::StatementInvalid (PG::UndefinedTable: ERROR: relation users does not exist
We set up the database server but we didn’t create/migrate the database. Since we are already connected to the container we will execute the required rake tasks.
bundle exec rake db:create db:migrate
What’s next
In the next tutorial we are going to:
- refactor this image for production (use volume for postgreSQL, asset precompilation)
- use nginx to serve them
- use docker compose to bind them all.
Thanks
I am very grateful for your feedback (like this one from DeusOtiosus @ Reddit).
That’s all! Cat photo.
For feedback, comments, typos etc. please open an issue in the repository.
Thanks for visiting!
 (
(